A man approaches a motorcycle, ready to ride.

5 Tips to Help you Pass a Motorcycle Basic Handling Test

I’m proud to say that I’ve recently passed my motorcycle Basic Handling Skills Test (BHST) in New Zealand, with a huge thanks to Jo at Ornsby Motorcycle Training. This post is in no way supported by or endorsed by Ornsby, I just have to give them a shoutout as their training was so instrumental to me passing this test.

The basic handling test was on my second ever lesson, and the second time ever touching a motorcycle. This seems to be pretty unique in New Zealand and is what left me feeling very low in confidence after my first lesson with another provider.

Many New Zealanders, especially in the South Island, seem to have been born on a motorbike. They had them on their farms, family members had them, or they otherwise had access to both motorcycles and private land on which to drive them without a licence in their early years. By the time they sit their course, they’re already comfortable on a motorcycle which means it’s far easier to take on each required section to pass the test.

On arriving for my first course, titled for “new riders”, it felt like it was a surprise to the instructor that I’d never touched a bike before. I was literally straight onto a bike and onto the BHST course layout; a fairly tight course consisting of traffic cones and tennis balls. As a new rider, you may as well have put me at the flight controls of a 747 and told me to land at Heathrow airport.

I left that first course with a good understanding of what would be included in the Basic Handling Skills Test itself, but honestly not a lot of knowledge of how to ride a bike. Of course, I didn’t expect to pass the BHST on my first ever lesson, or even the second, but being thrown in the deep end left me feeling less confident about riding a bike.

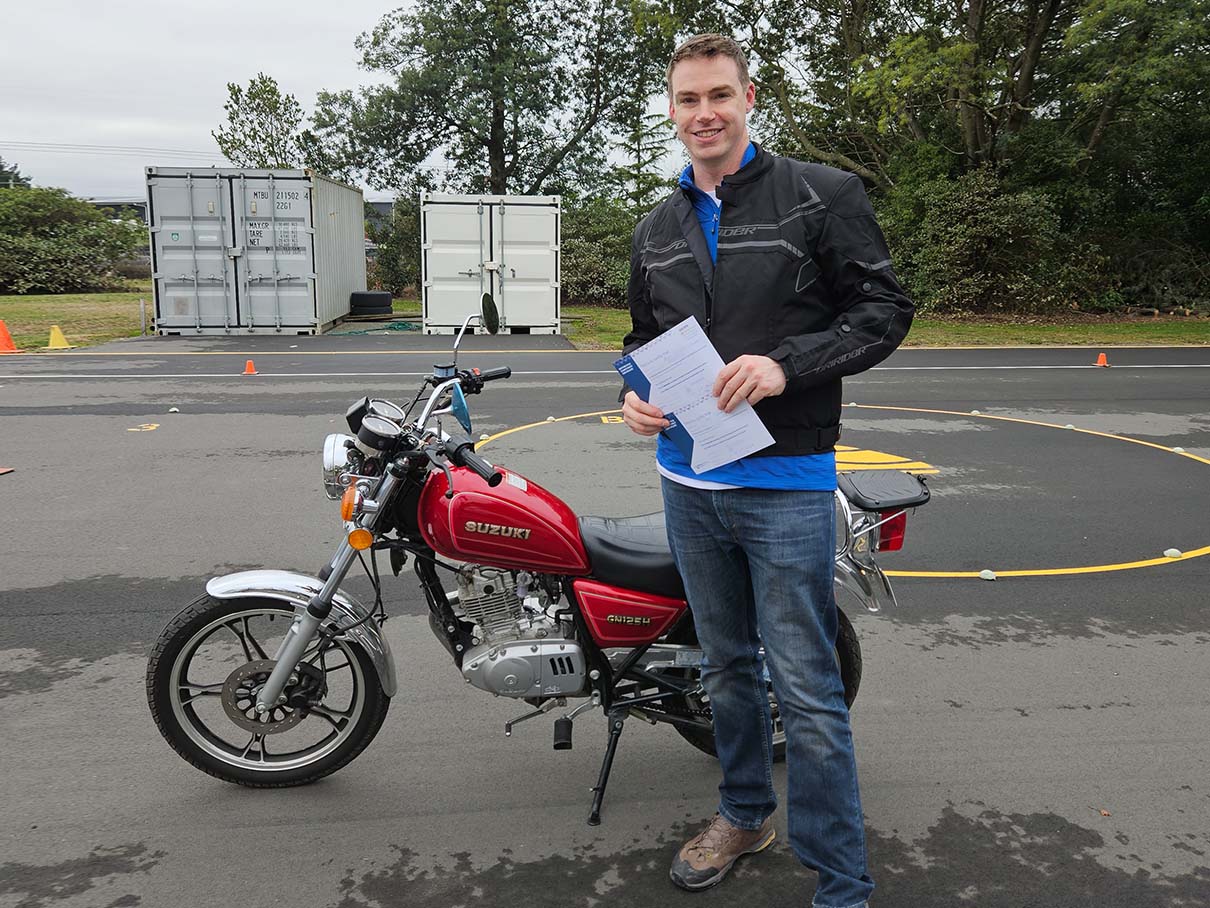
Not to blame the tools, but two things that I felt really held me back from being able to take on the course instruction were the XL, thick winter gloves I had bought prior to the course, and the large hiking boots that I was wearing on my size 12 UK feet. The Suzuki GN125 isn’t exactly a large bike and my big, thick gloves, big feet, and 6ft 2 frame made me feel like I was just flapping around at the controls without really being able to feel what I was doing.

New Zealand Transport Agency/Waka Kotahi’s video on the Basic Handling Skills Test

A few weeks after my first lesson I emailed Ornsby. I told them exactly where I was at and what I felt held me back, and asked for their advice on what type of course (a new rider lesson or the BHST itself) I should book next.

I then received a phone call from Ornsby’s booking person. She asked me more about the issues I had and then encouraged me to book a BHST over the phone, letting me know that if they felt I wasn’t ready for the test they’d just carry on with a regular lesson, noting it was the same price and time duration either way.

On the course I was met by Jo, who was instantly welcoming and reassuring. She gave me some time to re-establish a connection with the bike on a straight section of tarmac first before moving to the course, and the course itself was pre-painted in a designated area (noting that it still had the traffic cones and tennis balls to meet with national requirements).

After a quick play on the bike, Jo had figured out exactly how far along (not very) I was in my ability to ride a bike. Over the remainder of the course, she gave me some excellent pointers and instruction that ultimately meant I was able to pass the BHST in that same session with just 8 faults out of the maximum 16. I will definitely be going back to Jo for future instruction.

The biggest thing holding me back was not my knowledge of the test, but of basic motorcycle handling. And much of this came down to ergonomics. Putting these tips in place first meant that I was then able to take in the instruction for the test itself, giving me the huge boost of confidence that I very much needed.

On that note, here are the key five tips that helped lay the foundation for me to pass the test. I’m not sharing any insider-secrets here, and these certainly don’t replace the need to book professional instruction, but they will help you to prepare for the instruction itself.

Obvious disclaimer that I’m very new to this, and the below is based on my own personal experience. In short, employ the services of a professional instructor.

Motorcycle riding hand position

1. Relax your throttle grip

Despite wearing gloves (I’d switched to a thinner glove to help me feel the controls) it took no time at all for my instructor to see that I was holding onto the throttle far too tightly. My hand was holding onto the throttle with a death grip and my arm and elbow were locked tight.

The easiest way to demonstrate the effect this was having on the bike was to tell me to ride the straight-line sections using only my right arm, with my left arm on my lap. As soon as I removed my left hand from the handlebars, the bike dipped and steered to the right. This was because my right arm was holding on too firmly.

By relaxing my hand and my arm, the bike was far more flowing in its movements rather than responding in a jerky manner to every small shift of my hand and arm.

2. Fingers off the levers

Sub-tip: thinner gloves can be handy for the BHST, allowing you more feel of levers, throttles, and indicators. 

With big, thick gloves on, I spent the first lesson with the handlebars held by my open hands – between my thumb and first finger – and my fingers sitting on top of the levers. My throttle control was entirely by just the back half of my hand and thumb, giving me far less control, particularly given the bike spends most of its time in either first (for taking off) or second gear, and so throttle movements are more responsive than when in higher gears.

Having my fingers on the levers also meant more involuntary use of the brake or clutch when not needed. In my second lesson, the instructor quickly noted that I was lightly pulling the front brake lever when changing gears, causing the bike to struggle and my gear change to be a mess.

Taking my fingers off the levers and properly wrapping my hand around the handlebars meant that I had far more feel and control of the bike’s movements and could really feel the intricacies of the throttle.

When the time came to use the clutch or the front brake, it was a more purposeful movement to lift your fingers and place them on the levers, then move them back to the handlebars.

A rider on a motorcycle showing feet on pegs

3. Balls of the feet on the pegs

Sub-tip: the balls of your feet are at the front of your feet, it’s not the heel. 

Similar to my big gloves and hand positioning issue from the above point, I’d managed to complete my first lesson with the heels of my big boots on the pegs throughout, hovering the front of my feet over the brake and clutch pedals. This is completely wrong, but I didn’t know this until my second lesson.

With big feet and hiking boots, this left me in a position where I had no proper feel or control over the pedals. I was flapping my left foot around the clutch, catching my boot on it and never quite hitting it right, and I was using the rear brake to stop every time not because it’s just a handy thing to do but because my foot was basically already on it.

For my second lesson, I wore sturdy shoes instead of boots, which were a lighter weight, and it didn’t take the instructor long to notice my feet were positioned incorrectly so she stopped me to provide some instruction.

Your fit should be firmly on the pegs using the balls of the feet rather than the heel. When you need to use the pedals, it’s more of a purposeful movement to move your feet forward, use the pedals as needed, then return them to the pegs. This complete movement felt more natural than having your feet already in the way before they need to come into play.

Cornering on a motorcycle.

4. Knees into the bike

At first, I was letting my inside leg fall away from the tank as I turned a corner. Funnily enough, I was so focused on the ‘newness’ of everything else in the first lesson that I didn’t even notice I was doing this until the second lesson.

On keeping my knees into the tank – comfortably, not using lots of force – I suddenly felt far more at one with the bike and its movements. At first it felt more natural to drop the knee into the corner, perhaps because of spending a lot of time on a mountain bike, but on the cornering and figures of eight that you need to do on the Basic Handling Skills Test, it’s much better to keep your knees into the petrol tank and start thinking about how the balance and position of your whole body affects the handling of the bike.

5. Head up, eyes forward, straight bike.

This was something that was told to me from the beginning but that you have to keep reminding yourself to do as a new rider.

When you’re completely new to riding a motorcycle, it’s natural to want to look down at the controls. This was especially true in my first lesson with big gloves as I had zero feel of the indicator switch under my thumb, so I kept looking down at it to see where it was. I also kept looking down to see which gear I was in, despite the instructor’s advice that you can feel and hear when you’re in gear.

On a bike, especially if you’re a big guy on a small bike, your head movements and the ensuing shoulder and arm movements have a lot to say about which way your bike is pointing. If you’re riding in a straight line and you make a big deal of looking down to the left to see where the indicator is, then you may drop your left shoulder and affect the balance of the bike, causing the bike to start steering to the left.

This was also very apparent in the emergency braking part of the test. If you hit the brakes and look down and to the side, the bike slows then starts to lean, causing you to put your foot down early. If you keep your head up and eyes looking at a point straight ahead, you’re far more likely to come to a stop in a straight-up position.

And of course, when going around a corner you need to look where you want to go, not down at the controls or the ground in front of you.

Final Tips

I think the most important thing I learnt that would have helped me prior to going into the first course was to communicate with the instructor.

As a complete newbie, you may be overwhelmed by the bike, the course, and even the gear that you’re wearing (my wife laughed at me as I wore my motorcycle helmet around the house to try and get used to it before the lesson), so it’s easy to take a back seat to everything the instructor wants you to do. You keep your mouth shut so you can take it all in.

That sounds fine at first, but actually if you’re quiet and trying to stubbornly force yourself to get on with it and do as the instructor says, the instructor may incorrectly get a feel that you’re happy with the current steps and so take you onto the next step before you’re ready.

For me, I wish I’d said to the first instructor that I’d like five minutes to get a feel for the controls of the bike right from the beginning. I’d then spend time getting a feel for:

  1. Moving the indicator switch left, right, and back to the centre so that I could do it by feel and without looking,
  2. Pulling the levers while in neutral, moving my fingers from the handlebars to the levers and back until it felt natural,
  3. The placement of my feet on the pegs, moving them forwards to the pedals – pushing the brake pedal and getting a feel for the gear pedal, changing up and down gears, then moving them back to the pegs again,
  4. With the engine on and running, getting a feel for the throttle and giving it a few revs.

Following this, I’d then ask if I could take the bike back and forth in a straight line away from the course itself, removing the added details of traffic cones and corners from your first time on the bike and just learning the clutch’s activation point and how to change up and down between first and second gear.

Finally, your safety clothing choice is quite important. BHST course providers will state what gear they can provide and what they recommend you should bring to the course, and the instructors I found both said they can provide all the necessary safety gear and to just wear suitable footwear and clothing. But I wanted to get a head-start – knowing that sitting on a bike would be completely new to me, I didn’t want to do that for the first time while also wearing a helmet for the first time, so I bought my own helmet and bike gloves in advance.

This was great for the helmet, but actually I bought some thick winter gloves and ended up having little feel of the controls, especially with my XL hands and a small bike (with an indicator switch that needs to be manually returned to the centre… but not too far or you’ll just push it across to the other side). For the second course, I instead wore my mountain bike/motocross gloves that still have padded-knuckle protection but are thinner in the fingers. I did note that both instructors wore similar gloves and also had those available for the participant’s own use.

It’s a similar story for the footwear. My leather hiking boots may have seemed like a good idea at the time, but you’ll note that motorcycle boots typically don’t have big, thick tread and are generally quite flexible. They need to be so that you can move your feet backwards and forwards from the pegs and get your foot under the gear pedal to lift it up.

A shoutout to Ornsby.

In all fairness, the second course provider, Ornsby, had an advantage in that I provided a heap of feedback upfront. The instructor, Jo, added to this by being an excellent communicator, really understanding where I was at, what I felt comfortable with, and the perfect level of encouragement to see me through to the successful completion of the test.

One of the best things she could do was, on realising I was comfortable enough to manoeuvre around the course without support, to take a step back and say “Right, over to you. Have some time on the course and focus on the areas that you feel you want to improve on.”

For the next five to ten minutes, I had free rein to move around the course as I liked, stopping and starting when I wanted to, and practising the sections of the test that I knew I was weak on without an instructor stepping in to move me onto the next step. Instead of carrying out the instruction in a rush and thinking you better figure it out because you’re about to move onto the next step, you had the freedom to relax and repeat your problem manoeuvres until you were comfortable with them. For example, I chose to spend most of that time starting the bike from a position just before the turn so that I could practise changing gear while turning (disclaimer: I still managed to stall here on the test!).

I’m lucky that I live in the same region as Jo, and I’m looking forward to taking part in the future Ride Forever courses that she and Ornsby provide.

Christchurch-based, Orsnby provide motorcycle training courses throughout the South Island of New Zealand. You can find out more about Ornsby on their website.

Christchurch-area motorcycle training providers include:

You can find more information about the test, as well as providers in your area (including heaps more in Christchurch), on the NZTA website.

A new rider passing the motorcycle Basic Handling Skills Test.

The author with his pass certificate, fresh from the BHST thanks to Jo from Ornsby.

Photo credits: Gerhard Siebert and Gijs Coolen. Oh and Jo from Ornsby for the photo of my smiling face after passing the test.

0 replies

Leave a Reply

Want to join the discussion?
Feel free to contribute!

Leave a Reply

Your email address will not be published. Required fields are marked *

Read other posts

A new rider passing the motorcycle Basic Handling Skills Test.

5 Tips to Help you Pass a Motorcycle Basic Handling Test

Having completed the New Zealand Basic Handling Skills Test to ride motorcycles, I've put together five tips that were crucial to me passing.
BMW G 310 GS lightweight adventure motorcycle off road.

Top 5 Lightweight Adventure Motorcycles in 2024

Considering a lightweight adventure motorcycle? I've spent hours researching what's available and have put together a list of the top five.

Sign-up to receive email notifications of new posts